
How to Transcribe an Interview - Fast & Accurate
Learn how to transcribe an interview quickly and accurately. AI tools, tips & best practices for journalists and researchers. Try Audionotes free.
If you’ve ever recorded an interview and then had to turn it into written text, you already know it’s not as easy as it sounds. Transcribing interviews takes time, patience, and a good ear. But don’t worry. Whether you’re doing it for research, content creation, or journalism, this beginner’s guide will walk you through everything you need to know to get it done accurately. From choosing the right tools to picking up every word clearly, you’ll learn simple steps to make the whole process smoother and more efficient. Let’s jump right into it.
What Are the Different Ways to Transcribe an Interview?
If you’ve just finished recording an interview and need to transcribe it into text, there are several ways to accomplish this. Each option has its own pros and cons depending on how much time, budget, and accuracy you’re aiming for. Here are the 3 most common ways to transcribe an interview:
-
Automated (AI/software-based) Transcription
This is the fastest option if you’re short on time. Just upload your audio or video file, and within minutes, you’ll have a written version ready to work with. Platforms like Audionotes, Descript, and even Zoom’s built-in transcription feature make the process incredibly smooth and efficient. These tools are especially helpful when you’re on a tight deadline or working with large volumes of content. And while you might choose to make a few edits for clarity, automated transcription gives you a strong head start, saving you hours of manual work.
-
Manual Transcription
If you prefer full control over the content, doing it manually is a solid choice. You play the interview and type it out yourself, pausing and replaying as needed. It takes longer, but you’ll catch every word and get the formatting exactly how you want it. This method is ideal when accuracy is important, like for academic interviews, research, or content that will be published.
-
Hiring a Transcription Service
If you don’t have the time or don’t want to do it yourself, you can outsource the job to a professional transcription service. These services often combine software with human review to deliver highly accurate results. You send in your file, and they send back a polished transcript, usually within a few hours or days, depending on the service. It’s more expensive than the other two options, but it saves time and delivers professional quality.
How to Transcribe an Interview Using an Automated Tool?
Transcribing an interview doesn’t have to be a long and tiring process. With the right tool, you can get it done quickly and accurately. Here’s a simple step-by-step guide to help you get started:
-
Pick a Reliable Transcription Tool
Start by choosing a transcription platform that’s built for speed, accuracy, and ease of use. We recommend that you use Audionotes. It’s trusted by professionals, students, and content creators for turning audiovisual content into clear, readable transcripts in just minutes. Using a reliable tool like right from the start can save you both time and effort.
-
Upload Your Interview File
Once you’ve picked your tool, upload your audio or video file. Most platforms make this easy. You can drag and drop the file into the system or use the upload button. Just make sure your recording is clear, as that helps with better transcription results.
-
Let the Tool Do the First Draft
After uploading, the tool will process your file and give you a rough transcript in just a few minutes. The time it takes depends on how long your interview is. But usually, it’s pretty fast, and you get a solid draft to work with.
-
Review and Clean It Up
Even though automated tools are pretty accurate, they’re not perfect. This is your chance to read through the transcript and fix anything that doesn’t sound right. You might need to correct a few words, add punctuation, or adjust speaker names if your interview has more than one person. This step helps you make the final transcript look clean and professional.
-
Export Your Final Version
Once you’re happy with how it looks, you can export the transcript. Most tools let you choose from formats like Word, PDF, or plain text. That makes it easy to share with others, use in your research, or store for later.
How to Manually Transcribe an Interview?
Manually transcribing an interview is a long process, but with the right setup and a clear plan, it becomes manageable. Here’s how you can go about it, one step at a time:
-
Get Your Tools Ready
Before you begin, make sure you have everything you need in place. Sit somewhere quiet where you can focus without interruptions. Use a good pair of headphones so you can hear every word clearly. Open a text editor or word processing software where you’ll type out the transcript. If you want to make things easier, you can also install transcription software that lets you slow down audio or use keyboard shortcuts to pause and play.
-
Listen to the Whole Recording Once
It might be tempting to start typing right away, but hold off for a bit. Listen to the entire interview once from start to finish. This gives you a feel for the tone, flow, and pace of the conversation. You’ll also notice things like the speakers’ accents, unique phrases, or technical terms that may pop up again later. This first listen gives you context that will help you type more confidently when you start.
-
Break It Down Into Small Parts
Start the actual transcription by playing short segments, just a sentence or two at a time. Hit pause, then type exactly what you hear. Don’t try to keep up with the full speed of the recording. It’s completely normal to rewind often. Breaking it into small chunks will keep things accurate and less frustrating.
-
Label the Speakers Clearly
As you type, make it clear who is speaking. Use simple labels like “Interviewer:” and “Respondent:” at the beginning of each line or paragraph. If you know their names, use them. This makes your transcript easier to follow, especially when reviewing or sharing it with others later.
-
Add Timestamps If Needed
If you or someone else might need to refer back to a certain part of the recording, adding timestamps is a smart move. You can place them every minute or whenever there’s a topic shift. Just type something like [00:03:15] to mark the time. It saves a lot of trouble if you need to revisit a specific section.
-
Proofread and Format the Transcript
Once you’ve typed out the whole thing, take a break, then come back and proofread your work. Check for typos, missing words, and awkward phrasing. Play the audio again while following along with your text to catch anything you might have missed. Make sure everything is spaced out well, speaker labels are consistent, and the document looks clean and easy to read.
How to Hire a Transcription Service?
Here’s a step-by-step guide to help you get started with a transcription service:
-
Start with Research and Comparisons
Begin by searching for transcription companies or freelancers with solid reputations. Check online reviews, browse their websites, and look at samples if available. It’s always better to go with a provider that has been tried and tested by others. Customer testimonials and client feedback can give you a clear idea of what to expect in terms of quality and reliability.
-
Understand How They Charge
Different transcription services use different pricing models. Some charge per audio minute, others by word count, and a few may offer fixed pricing depending on the length or complexity of your file. Knowing how they charge helps you budget better and avoid surprises when the invoice arrives. Don’t forget to check if there are extra fees for things like poor audio quality or additional speakers.
-
Know Their Turnaround Times
How soon do you need the transcript? Make sure the provider can meet your deadline. Some services offer faster delivery for an extra fee, so it’s important to check the options available. If your project is time-sensitive, always go with a provider who clearly states their turnaround times upfront.
-
Look Into Their Accuracy Standards
Accuracy should be a top priority, especially for professional or academic content. Check if the service has a strong review process in place, preferably one that includes human proofreading. A service that relies entirely on AI might be quicker, but may not always catch context-specific errors. Go for a provider that balances speed with precision.
-
Make Sure Your Data Is Safe
If your audio includes sensitive or confidential information, security becomes a serious concern. Choose a provider that offers secure file uploads and has clear privacy policies. It’s also wise to ask if they’re willing to sign a confidentiality agreement. These measures give you peace of mind that your data is in safe hands.
-
Upload Your Files and Share Clear Instructions
Once you’re confident in your choice, upload your audio or video files to their platform. This is also the time to give any specific instructions. Let them know if you need things like timestamps, speaker names, or a word-for-word transcript. The clearer your instructions, the better the final result.
-
Review the Final Transcript Carefully
When you get the transcript back, take a few minutes to read through it. A professional service will aim for high accuracy, but giving it one final check ensures everything’s in order. You can fix small things like names or unclear parts before using the transcript for publishing, sharing, or archiving.
How to Transcribe an Interview Using Audionotes?
If you want to transcribe an interview quickly without much hassle, Audionotes makes the process simple and smooth. Here’s how you can do it step by step:
Step 1: Log in to Your Audionotes Account
Start by logging into your Audionotes account. If you don’t have one, you’ll need to sign up first. Once you’re in, you’ll be taken to your main dashboard.
Step 2: Click on “Upload an Audio/Video File”
Look for the option that says “Upload an Audio/Video File” and click on it. This is where you’ll begin the transcription process.
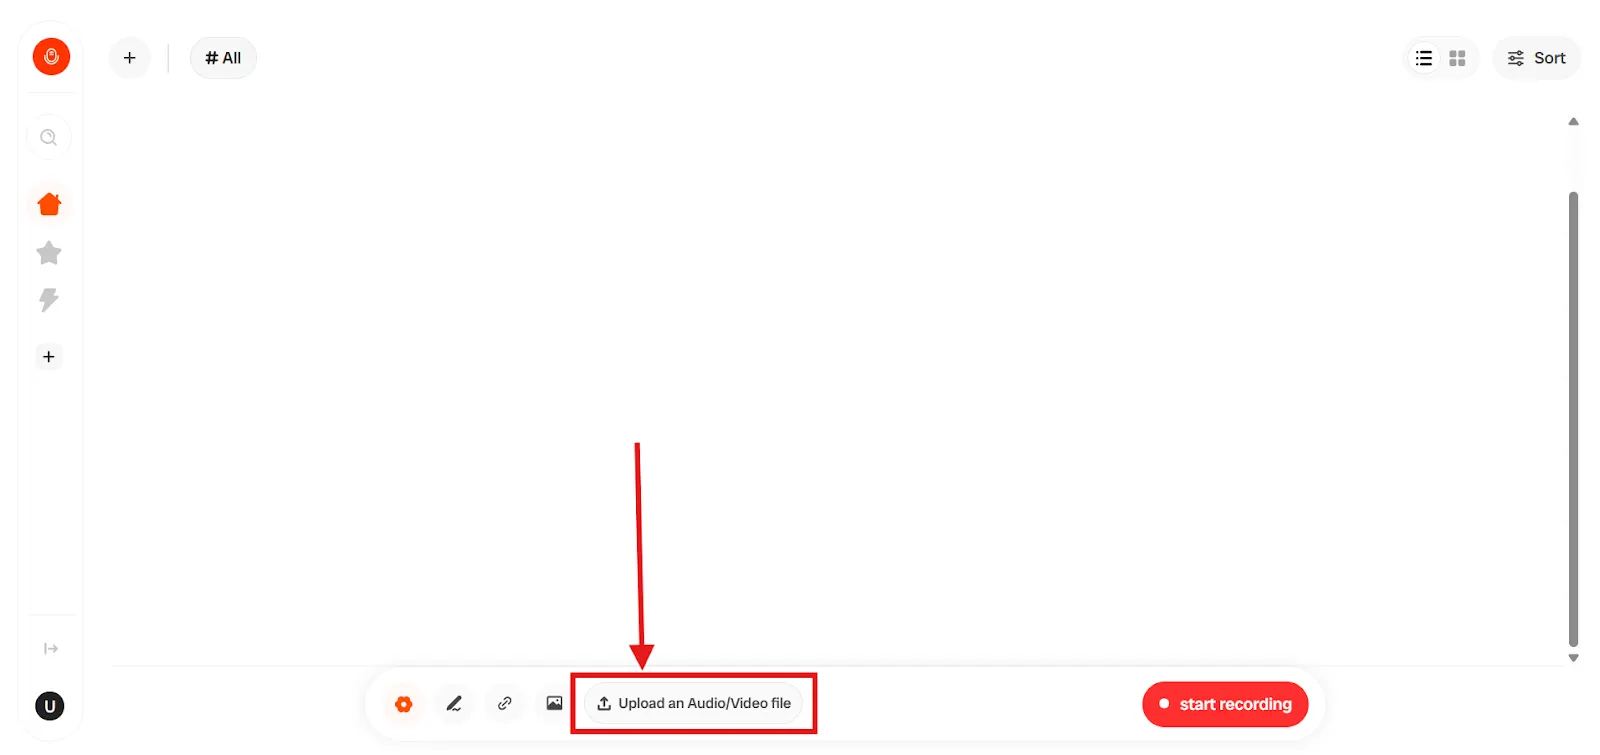
Step 3: Select Your Interview File
Now choose the audio or video file of your interview. You can upload files in various formats. Make sure the audio is clear enough so the transcription can come out accurately.
Step 4: Let Audionotes Transcribe Your File
As soon as you upload your file, Audionotes will begin transcribing it automatically. You don’t need to click anything else. Just wait a few moments while the platform processes the content.

Step 5: Find the Transcription on Your Dashboard
Once the transcription is ready, you’ll see the file appear on your dashboard. It’ll be listed with the name of your uploaded file, making it easy to find.
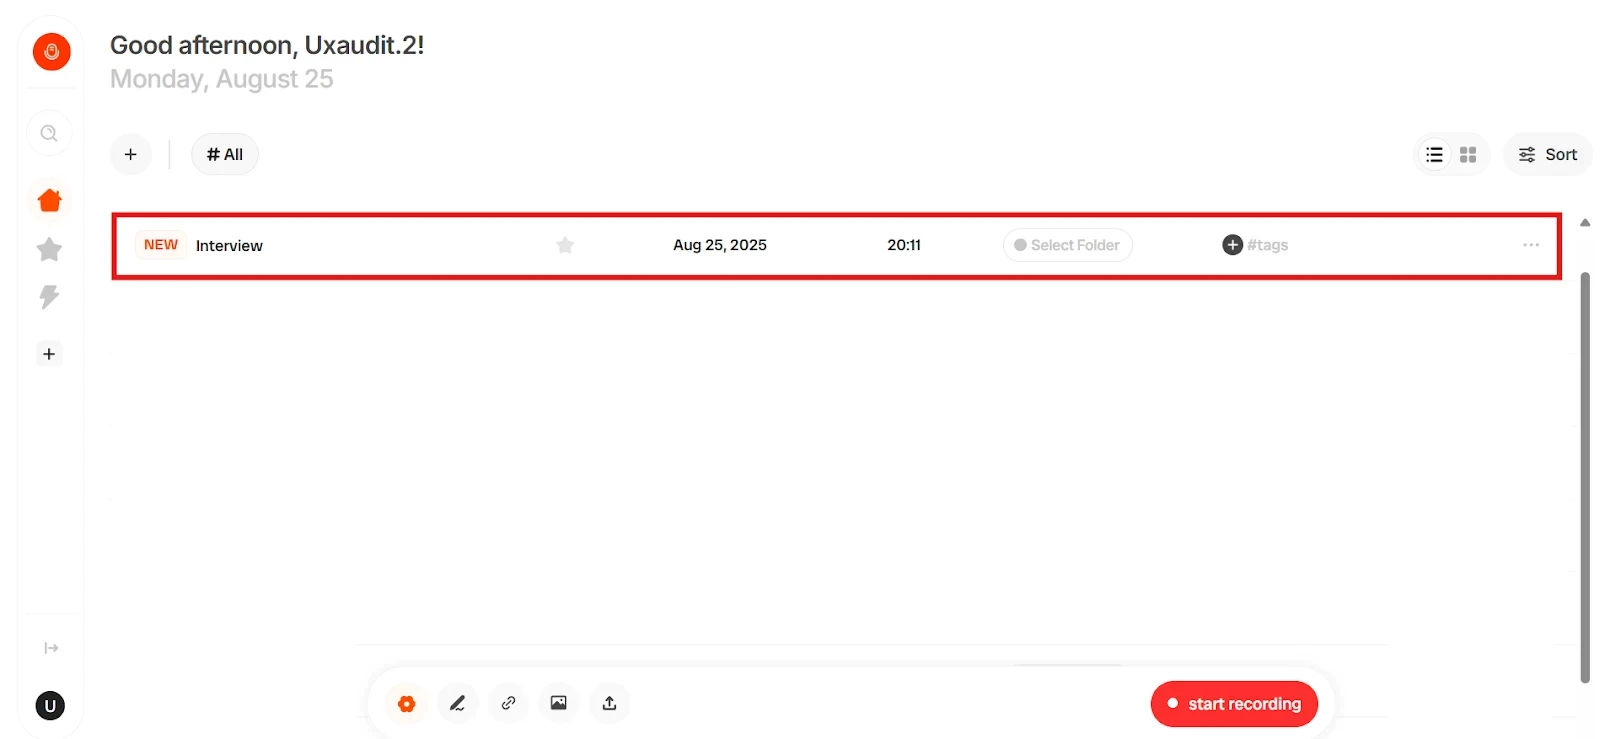
Step 6: Click to View the Full Transcription and Notes
Click on the file to open it. Inside, you’ll get access to the full transcription of the audio or video. You’ll also see organized notes pulled from the content.
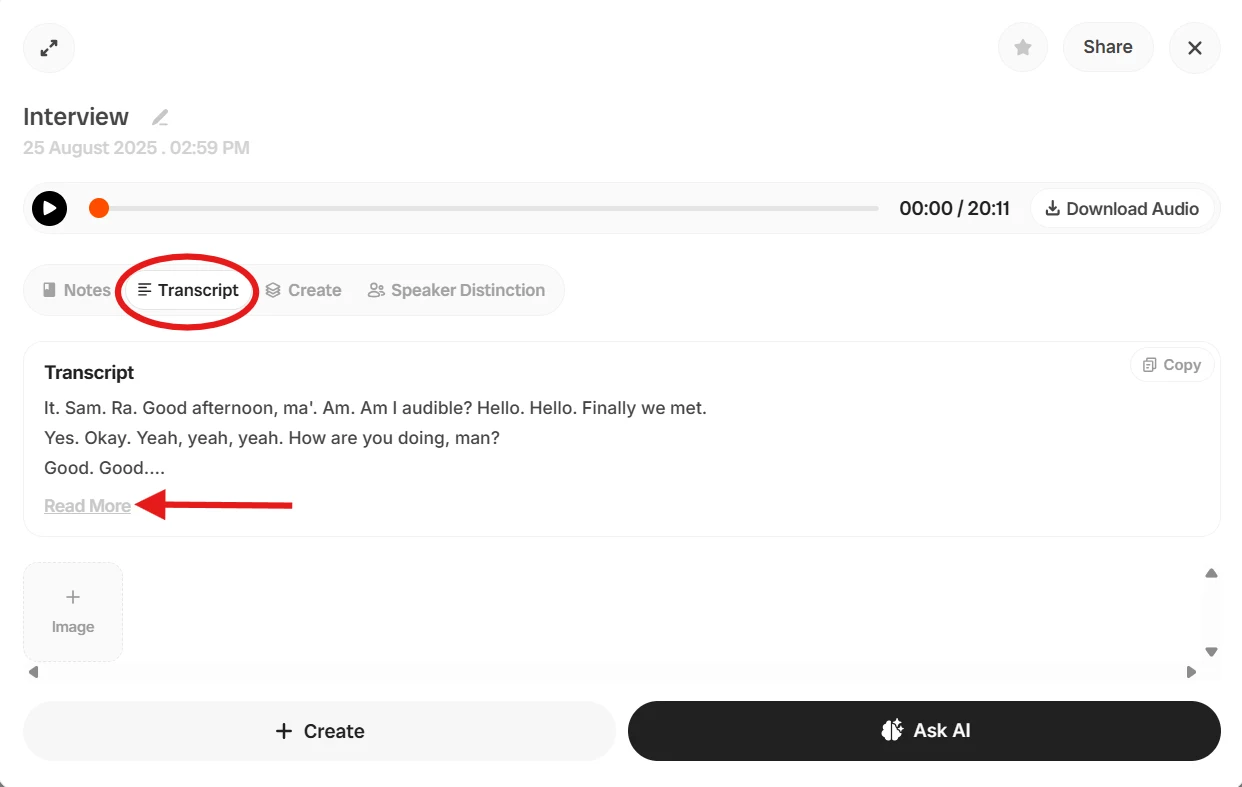
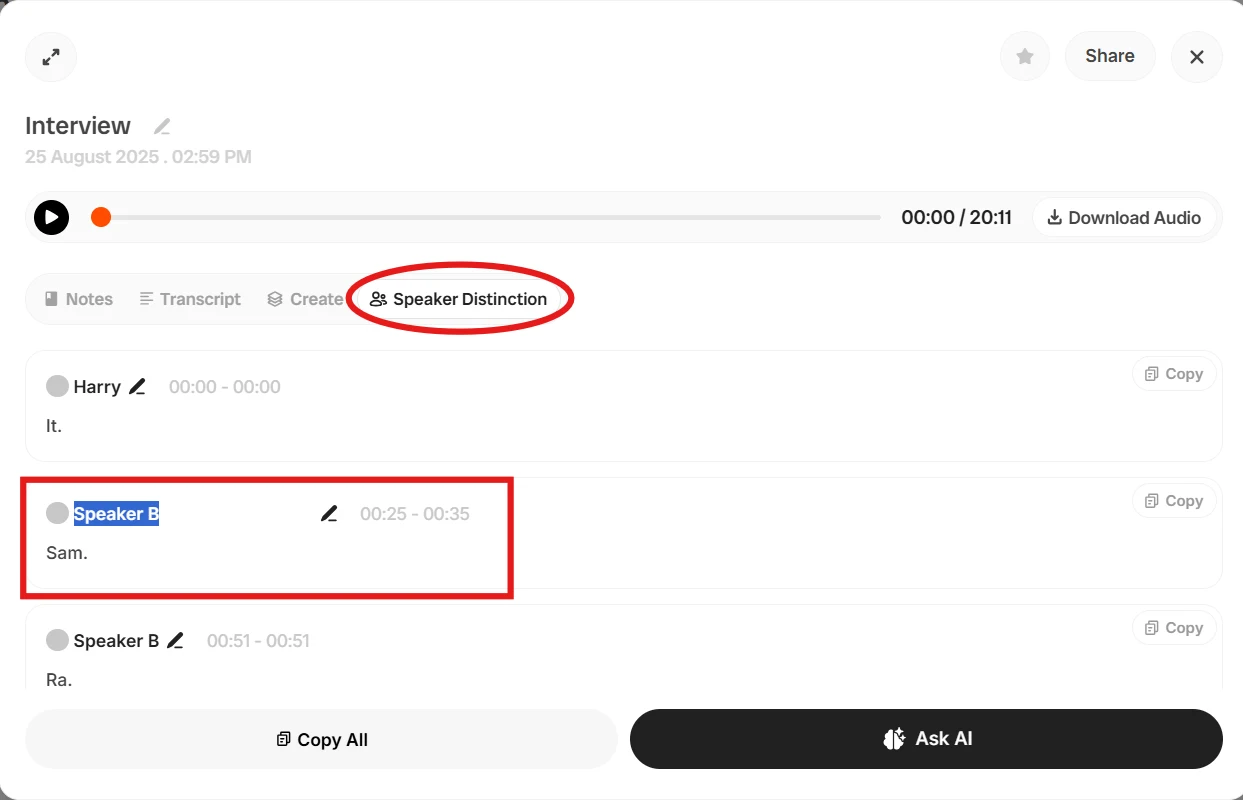
If your interview had multiple people, there’s a Speaker Distinction option where you can assign names to each voice. This makes your transcript clearer and easier to follow.
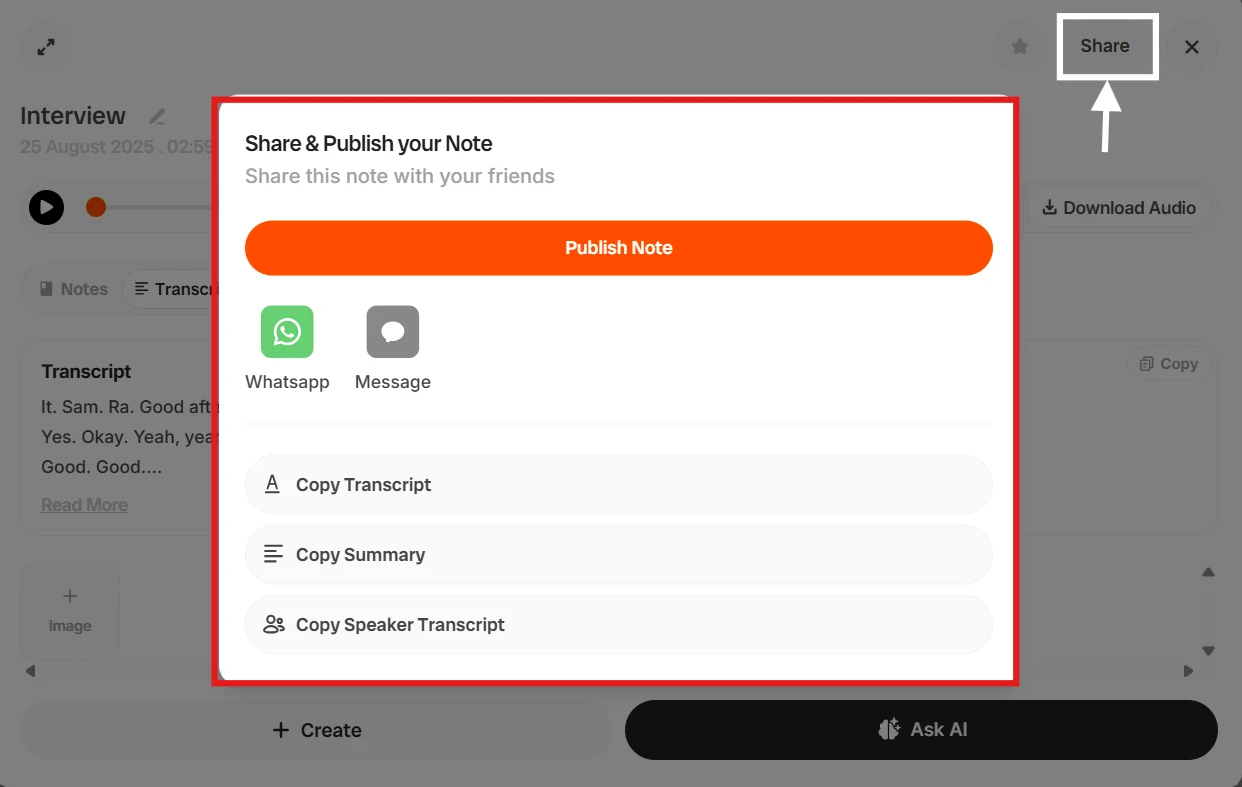
Step 7: Share your transcript easily with anyone
You can share the transcript with anyone using WhatsApp, a live link, or by copying the transcript.
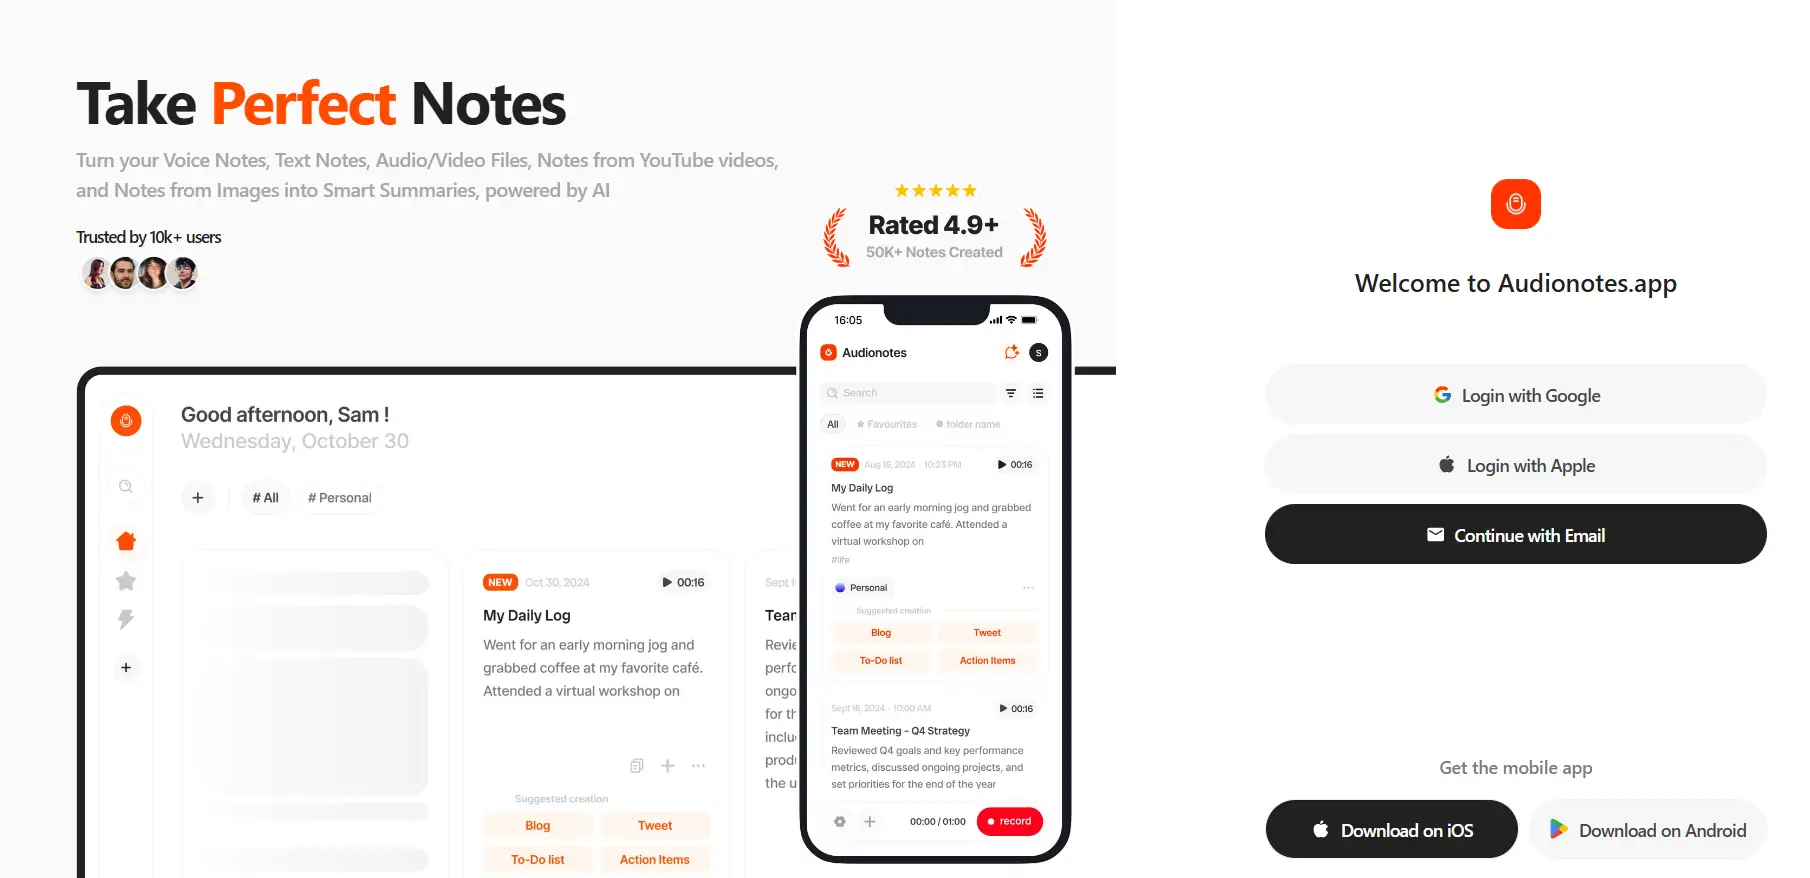
Turn your voice recordings, text notes, images, audio and YouTube videos into perfect notes for meetings, journals, lectures, emails, and more.
Which Method Should You Choose to Transcribe an Interview?
As mentioned earlier, there are three methods to transcribe an interview, and each comes with its own advantages and trade-offs depending on your time, budget, and accuracy needs. Let’s take a look at their comparison below:
Aspect
Manual Transcription
Automated Transcription
Hiring a Transcription Service
Time Required
This process is slow. Depending on audio quality and length, it may take 4 to 6 hours to transcribe just one hour of recording.
Results are available in minutes. Ideal when you need transcripts urgently or are working with high volumes.
Turnaround depends on the provider. Some offer same-day delivery, while others may take 1 to 3 business days.
Accuracy
Accuracy is high if done carefully. However, mistakes can still happen due to human error or unclear audio.
Accuracy has improved a lot with AI. Clean recordings with minimal background noise produce very reliable results.
Generally high, especially if human editors review the transcript. Quality depends on the service provider’s standards.
Cost
No cost if you’re doing it yourself, but it takes a lot of your time.
Usually much cheaper than hiring a service. Many tools offer free minutes or low-cost plans.
More expensive than the other options. Pricing often depends on audio length and required turnaround time.
Technical Skills Needed
Requires strong listening and typing skills. May also need knowledge of transcription software.
Very easy to use. You just upload the file and wait for the output. No special skills needed.
No technical involvement. You send the file, and the service takes care of everything.
Effort Involved
Very high. You have to pause, rewind, and type everything out manually.
Very low. The tool does the transcription for you. You only need to review and make small corrections if needed.
Effort is minimal. You upload the file and receive a polished transcript.
Editing and Customization
You control the formatting and style completely.
Most platforms let you edit within the tool and download in different formats.
Editing may be limited unless the service allows custom requests.
Best Use Cases
Useful when accuracy is critical and you’re comfortable spending more time.
Perfect for quick drafts, note-taking, interviews, podcasts, or content that needs fast turnaround.
Ideal for professional, legal, or medical work where accuracy and confidentiality are essential.
Limitations
Time-consuming and tiring. Not ideal for long or multiple files.
Struggles slightly with poor audio or heavy accents, but many tools now offer speaker recognition and noise filtering.
Can be costly. Turnaround times may not suit last-minute needs.
Confidentiality Control
Fully in your hands since the file stays with you.
Depends on the tool’s privacy policy. Many offer encrypted uploads and secure storage.
Usually comes with signed confidentiality agreements and data protection practices, especially with top-tier providers.
Learning Curve
Takes practice, especially for first-timers.
Very simple to get started. Just upload, and the tool handles the rest.
No learning involved. You rely fully on the service provider.
Closing Thoughts
Transcribing interviews might seem like a tough job at first, but once you understand your options, it becomes much easier to manage. Whether you prefer doing it manually, using tools like Audionotes, or hiring a service, the goal is to find a method that works best for your time and comfort level. Just remember, no matter which way you go, a clear and accurate transcript can make your content or research stronger and more useful. So take your time, try out what fits, and keep refining your process as you go.
Your cluttered Thoughts into clear Text Notes using AI | Try for Free
Frequently Asked Questions (FAQs)
-
What is a transcription of an interview?
A transcription is simply the written version of your interview. It turns spoken words into text so you can read, edit, or share the conversation easily.
-
What is the easiest way to transcribe an interview?
The easiest option is to use an automated transcription tool like Audionotes. You just upload or record your interview, and within a few minutes, you’ll have a text version ready for review. It saves you a lot of time compared to typing everything by hand.
-
Are automated transcription tools accurate?
Yes, most modern tools are very accurate if your audio is clear. They can handle different speakers, accents, and even some technical language. If you want to be extra sure, you can quickly review and make small edits after the tool does its job.
-
Should I transcribe my interview verbatim or clean it up?
It depends on what you need it for. If you want every single word, including pauses or filler words like “um” and “uh,” go with a verbatim version. That’s useful for legal records or research.
If you want something easier to read, like for a blog or report, go with a cleaner version that skips the fillers and polishes the language a bit.
-
Can I transcribe a video interview the same way as an audio interview?
Yes, you can. Most tools work with both video and audio. Just upload the video, and the tool will pull the audio and create a transcript for you.
![Best Medical Dictation Software in 2025 [Top 7]](/blog/covers/best-medical-dictation-software.png)
![How to Get a Podcast Transcript - Easy Guide [2026]](/blog/covers/how-to-get-a-transcript-of-a-podcast.png)
![How to Record & Transcribe Meeting Minutes [2025]](/blog/covers/how-to-improve-note-taking-skills.webp)